By the end of this page, you’ll understand the very basics of how Python works, and we’ll use that to make a robot move on our command, to reach a flag!

Recap / What is Python?
As we were setting up Python last time, we ran some sample code and just checked that everything worked (If it didn’t, make sure to go back through the previous page).
Today let’s try to explain what is going on in this example and understand Python’s basic concepts, giving you the skills to write similar programs yourself.
First, a bit about Python. Python code is run line by line, meaning that in the code we viewed previously, line 1 would run, then line 2, and line 3, and so on. Much like the steps to a cooking recipe, a program often has a rather obvious flow. You complete one step and move on to the next.
Armed with this information, let’s try to unpack what Python is doing in the code from last time:
1
2
3
4
5
6
7
my_number = 3 + 4
my_name = "Mr. Robot"
message = "You've done everything correctly!"

print("Hello from test.py!")
print(message)
print(f"Hi {my_name}. Do you like the number {my_number}?")
Line 1 my_number = 3 + 4
We create a variable. A recipe might ask to remember something for later use (Remember how many minutes you left the cake in the oven, this will affect the resting time). Similarly, we can tell Python to remember certain data through the use of variables. A variable has a name (in this case, my_number) which we use to look at or change what Python remembers. Later on in the code, if we use this name, Python knows to replace it with the value we remembered (So my_number + 1 is 8). To remember some value, we write variable_name = variable_value. In this case, we store the number 7 into my_number.
Strings
Before we continue, let’s talk a tiny bit about data. Python, and many other programming languages, can answer simple questions, like:
- What’s 3 plus 4?
- Is there an ‘a’ in the word ‘giraffe’?
But to do so, we need to represent numbers and words in Python somehow. For numbers, this is easy; we can just use the numbers themselves, as you saw above with my_number = 3 + 4. For words/messages, we need some way to tell Python that this text is not code and is just a message. We do this by surrounding the message with quotation marks ".
So while Hey python, do this! is code, "Hey python, do this!" is a bit of data, called a string.
Lines 2 and 3 my_name = "Mr. Robot", message = "You've done everything correctly!"
On line 2, we create another variable. However, in this example, the value we create is not a number; it’s a string!
On line 3, we do the same thing.
Lines 5 and 6 print("Hello from test.py!"), print(message)
On line 5, we use the function print. print allows us to print data to the screen. Any data between the () brackets gets printed to console, so print(my_number) would print 7. If you want to print multiple bits of data, they need to be separated by commas (try print(my_number, "test")).
Line 5 has just a string in the brackets, so that string gets printed to the console (Without the quotation marks!).
Line 6 is similar, except it uses a variable. Python then replaces that variable with the value we are remembering, and prints it!
Alice is writing some code to print a message to the screen. She wants the following message to be printed:
1
2
Hello World!
30 + 3 = 33
But currently her code has two bugs (errors in programs are often called bugs). Can you spot them?
1
2
3
4
5
my_message = Hello World!
my_number = 33

print(my_message)
print("30 + 3 = my_number")
After fixing the first problem, the code will run, but the second line printed will not be 30 + 3 = 33. Why is this?
Line 7 print(f"Hi {my_name}. Do you like the number {my_number}?")
Before the quotation marks, we have an f on line 7. Surely this is a typo! But actually, this f is vital. It stands for format and allows us to insert data into our string! Anywhere in the string, if some text is surrounded by curly brackets ({}), Python will assume this is code and run it. So we can write print(f"5 + 4 = {5+4}") to get ‘5 + 4 = 9’!
Because we have {my_number} and {my_name} on line 7, these get replaced with 7 and Mr. Robot.
We saw that the following message was printed to the console:
1
2
3
Hello from test.py!
You've done everything correctly!
Hi Mr. Robot. Do you like the number 7?
Can you modify only lines 1, 2, and 3 in the code above so that the following is printed:
1
2
3
Hello from test.py!
You've done everything INcorrectly >:)
Hi 24. Do you like the number seven?
Writing your own stuff
Python can do a lot more with variables and data than print it to a console, however. What makes programming interesting is that we can modify these values to do more exciting things. For example, we can do simple maths with numbers:
1
2
3
4
5
6
7
8
9
10
11
12
# Create some variables
x = 2
y = 3
print(x + y)
# The * is for multiplication.
# You can write it with Shift and 8 on the keyboard
# The # is written with Shift and 3 on the keyboard
print(x * y)
print(x / y)
# A late entrant! Variables from variables!?
z = x + y
print(z / 3)
1
2
3
4
5
### Output ###
>>> 5
>>> 6
>>> 0.66666667
>>> 1.66666667
The greyed out lines in the code above are comments.
Python doesn’t care about comments, they are just ignored when running code. A comment starts with the # symbol.
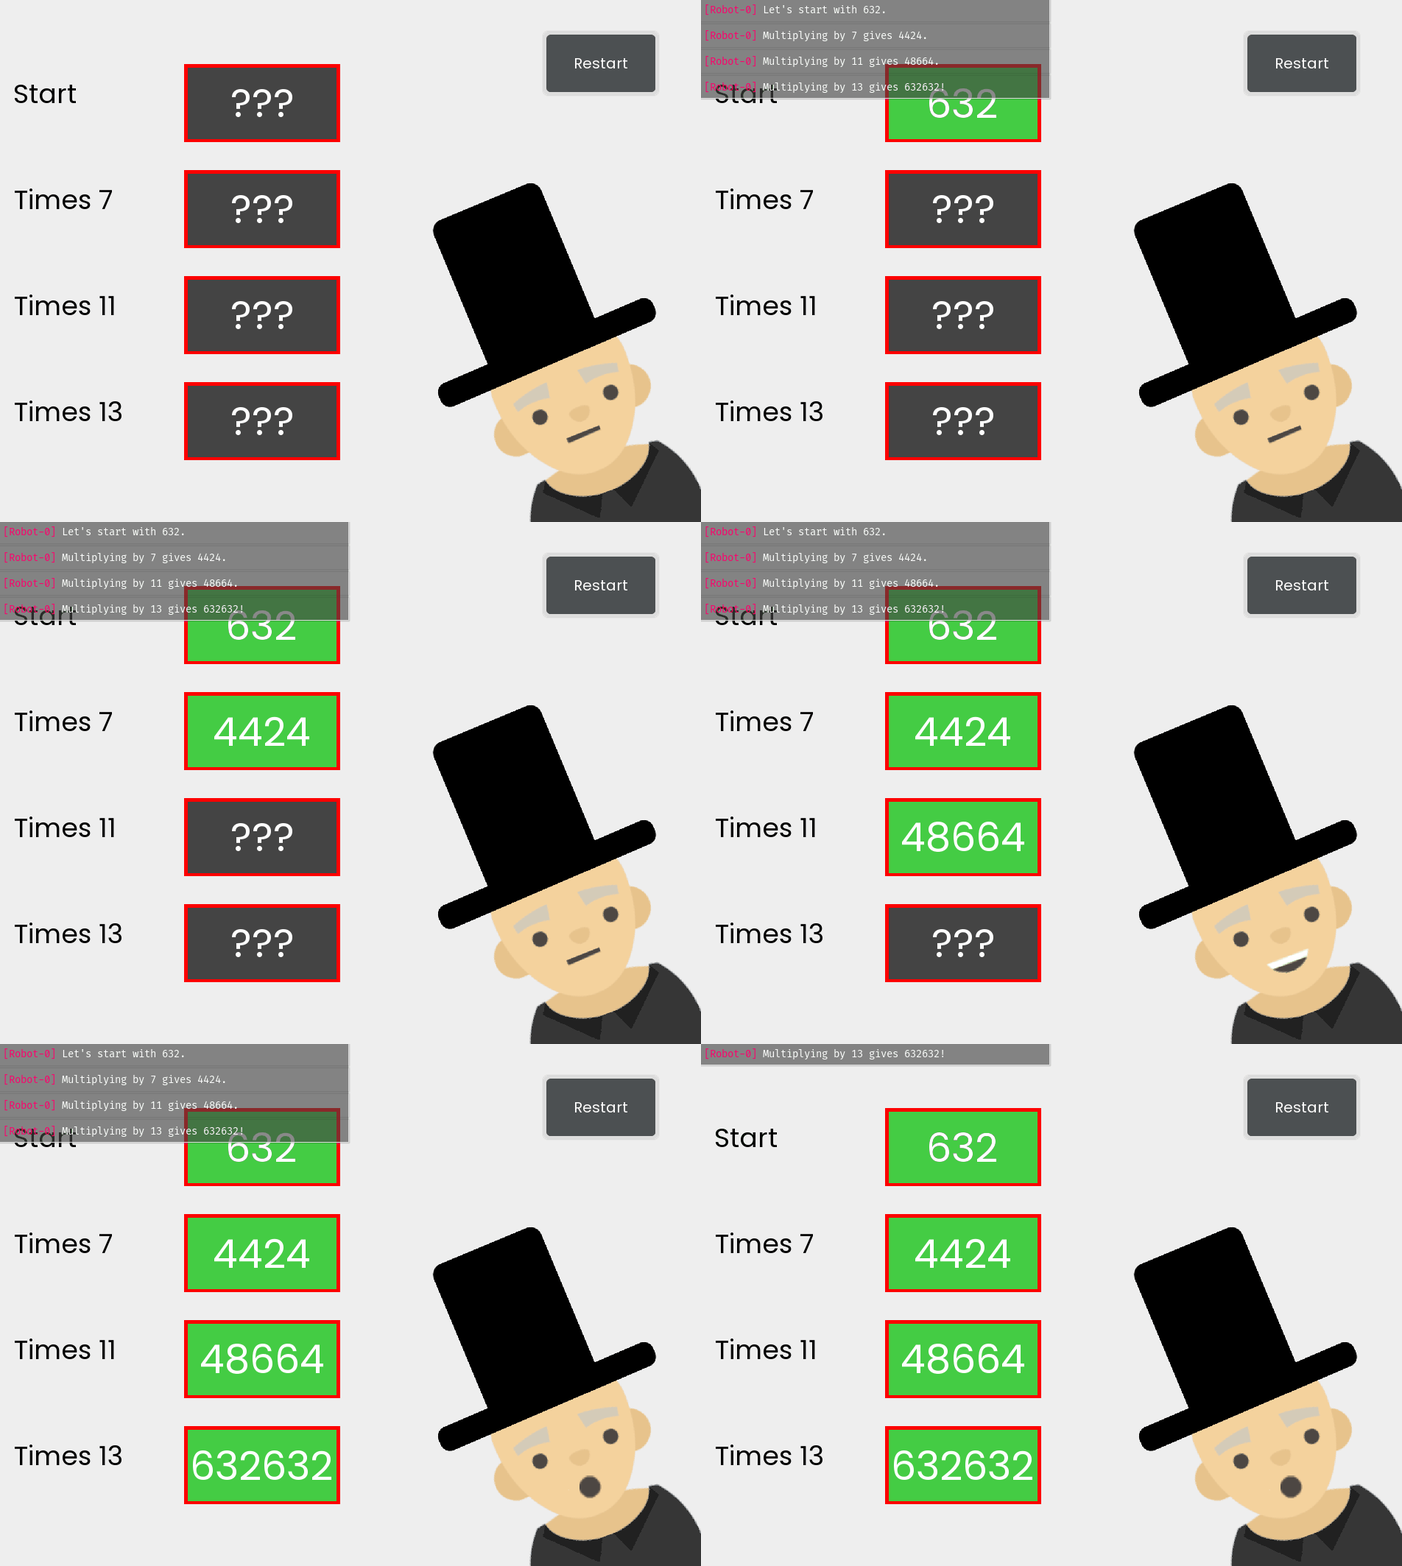
Jacob the mathemagician wants to complete an age-old magic trick. It is completed as follows:
- Take any 3 digit number
- Multiply the number by 7
- Multiply the number by 11
- Multiply the number by 13
- The result should then be the same 3 digit number, repeated!
Jacob, however, has forgotten how to translate some of these steps into Python code, can you help him?
You can download the task here.

Hopefully, you can see by now that variables are quite versatile. We can use them to store values. We can even have variables based on other variables (z = x + y). They are limited in one way though - their values don’t change unless you change them yourself.
1
2
3
4
5
6
7
8
x = 2
y = 3
z = x + y
print(z)
# Here I'll update y. It won't affect the value of z however.
y = 5
# So x+y = 7 now
print(z, x+y)
1
2
3
### Output ###
>>> 5
>>> 5 7
This is because of the way variables are created. When you write something like z = x + y, The following happens:
- First, Python inspects the right-hand side of the
=sign. This means that thexbecomes2, theybecomes3because of the data these variables contain, and sox + ybecomes5. - The right-hand side value is then stored in the left-hand side variable. So
5is stored inz.
Additionally, the left-hand side can only be one variable name; you can’t have x=3, y=2 and then set x+y=z. So the code won’t work unless you move it around so that z is by itself on the left-hand side.
This can seem restrictive, but there’s more fun stuff we can do because of this restriction:
1
2
3
4
5
variable = 1
variable = variable + 1
print(variable)
variable = variable * variable * variable
print(variable)
1
2
3
### Output ###
>>> 2
>>> 8
Let’s see why this works by analysing the second line, variable = variable + 1:
- First, Python inspects the right-hand side of the
=sign. This means thatvariablebecomes1, sovariable + 1becomes2. 2is stored invariable(from the left-hand side).
So a variable can change itself!
Controlling Motors
Now that we’ve got some of the basics down pat, we can start controlling the robots.
We'll take the bot you've already created and add some motors to it. You can do this by pressing the pencil icon on the bot menu, and selecting the device button (White square with red circle) from the left hand sidebar.
When you place the motors, you need to select a port field. Set the motor port fields to outA and outB for two different LargeMotors. This will allow us to connect to these LargeMotors in our code.
Next, we’ll start writing code to control the motors. Here’s a simple script that will turn one motor forward for 1 second, and then reverse the same motor for 1 second.
1
2
3
4
5
6
7
8
9
10
# Include LargeMotor functionality.
from ev3dev2.motor import LargeMotor, OUTPUT_A, OUTPUT_B

# Connect to the large motor on port outA
first_motor = LargeMotor(OUTPUT_A)

# Go forwards at full speed
first_motor.on_for_seconds(100, 1)
# Go backwards at full speed
first_motor.on_for_seconds(-100, 1)
The first line imports functions that we can use in our code. Just like print is a keyword we can use to run some command (sending data to the screen), importing allows us to add more keywords that reference other commands (Like connecting to motors).
To send commands to the LargeMotor, we have to connect to the device, and then store this connection in a variable, as line 5 does. OUTPUT_A corresponds to the port outA we selected before (We can use the keyword OUTPUT_A here because we imported it on line 2).
After this, we can send commands to the motor through the variable we created. For example, my_motor.on_for_seconds(x, y) then turns the motor on for y seconds at x speed (x can be anything from -100 to 100, and y must be positive). If you start the simulator, this code should move the robot forwards then backwards.
Notice how, in the example code above, the motor moves forwards and then back, separately. This is because on_for_seconds is a blocking operation. This means that the code will not keep running until the motor has run for that many seconds.
If instead, we wanted the operation to not block our code from running (like when we want to run two motors at once), you need to use the following code:
1
2
3
4
5
6
7
8
9
from ev3dev2.motor import LargeMotor, OUTPUT_A, OUTPUT_B

first_motor = LargeMotor(OUTPUT_A)
second_motor = LargeMotor(OUTPUT_B)

# This first command won't block.
first_motor.on_for_seconds(100, 1, block=False)
# This second command will block.
second_motor.on_for_seconds(-100, 1)
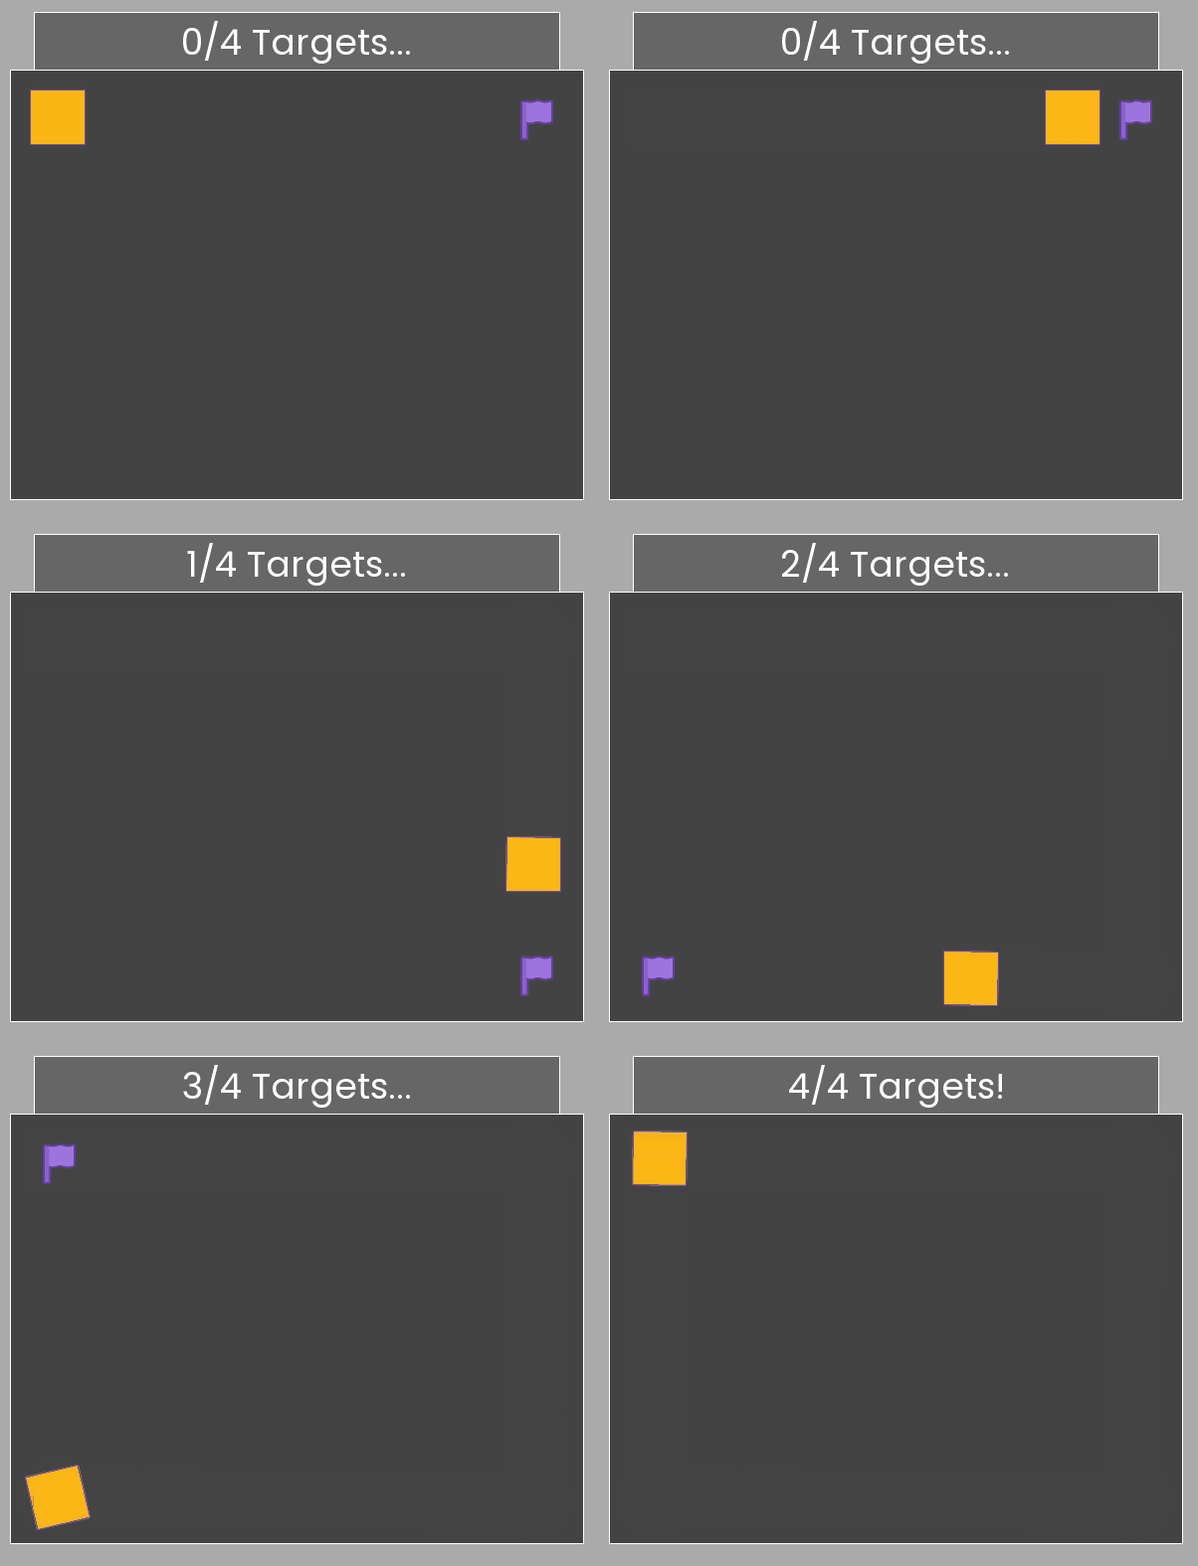
Using these skills, let’s write some code to move around the field in a square pattern, hitting all 4 locations.
You can download the task here.
Pressing the Bot button will allow you to edit the bot and add motors. Pressing the Code button will allow you to edit the code the bot will run, controlling the motors.
Here’s an example of what you need to make the bot do (With the motors invisible, so you can’t see what the solution is):

Getting user input
Another thing that Python can do is ask for data while we are running the code. We do this with the input function.
Try running the following code:
1
2
name = input("What's your name?")
print(f"Hello {name}!")
When running this code in the simulator, a box should appear below the console. Type your name and then press the enter key. You should then get the personalised message printed with your name!
The data in the () brackets of input will first be printed to console as a prompt. Then, once you enter your name (or any other data) and press enter, the string (remember: message) of that data is stored in the variable name.
So if you entered Chris as your name, the code would do the same thing as
1
2
name = "Chris"
print(f"Hello {name}!")
However, because this input is always a string, we need to change this slightly to supply our program with numbers. Python has a function int, which converts any string into an Integer (Whole number). So int("4") is the number 4 in Python.
Using this int function, we can convert our input into a number:
1
2
my_number = int(input("How many programs have you written?"))
print(f"I've written {my_number + 1} :p")
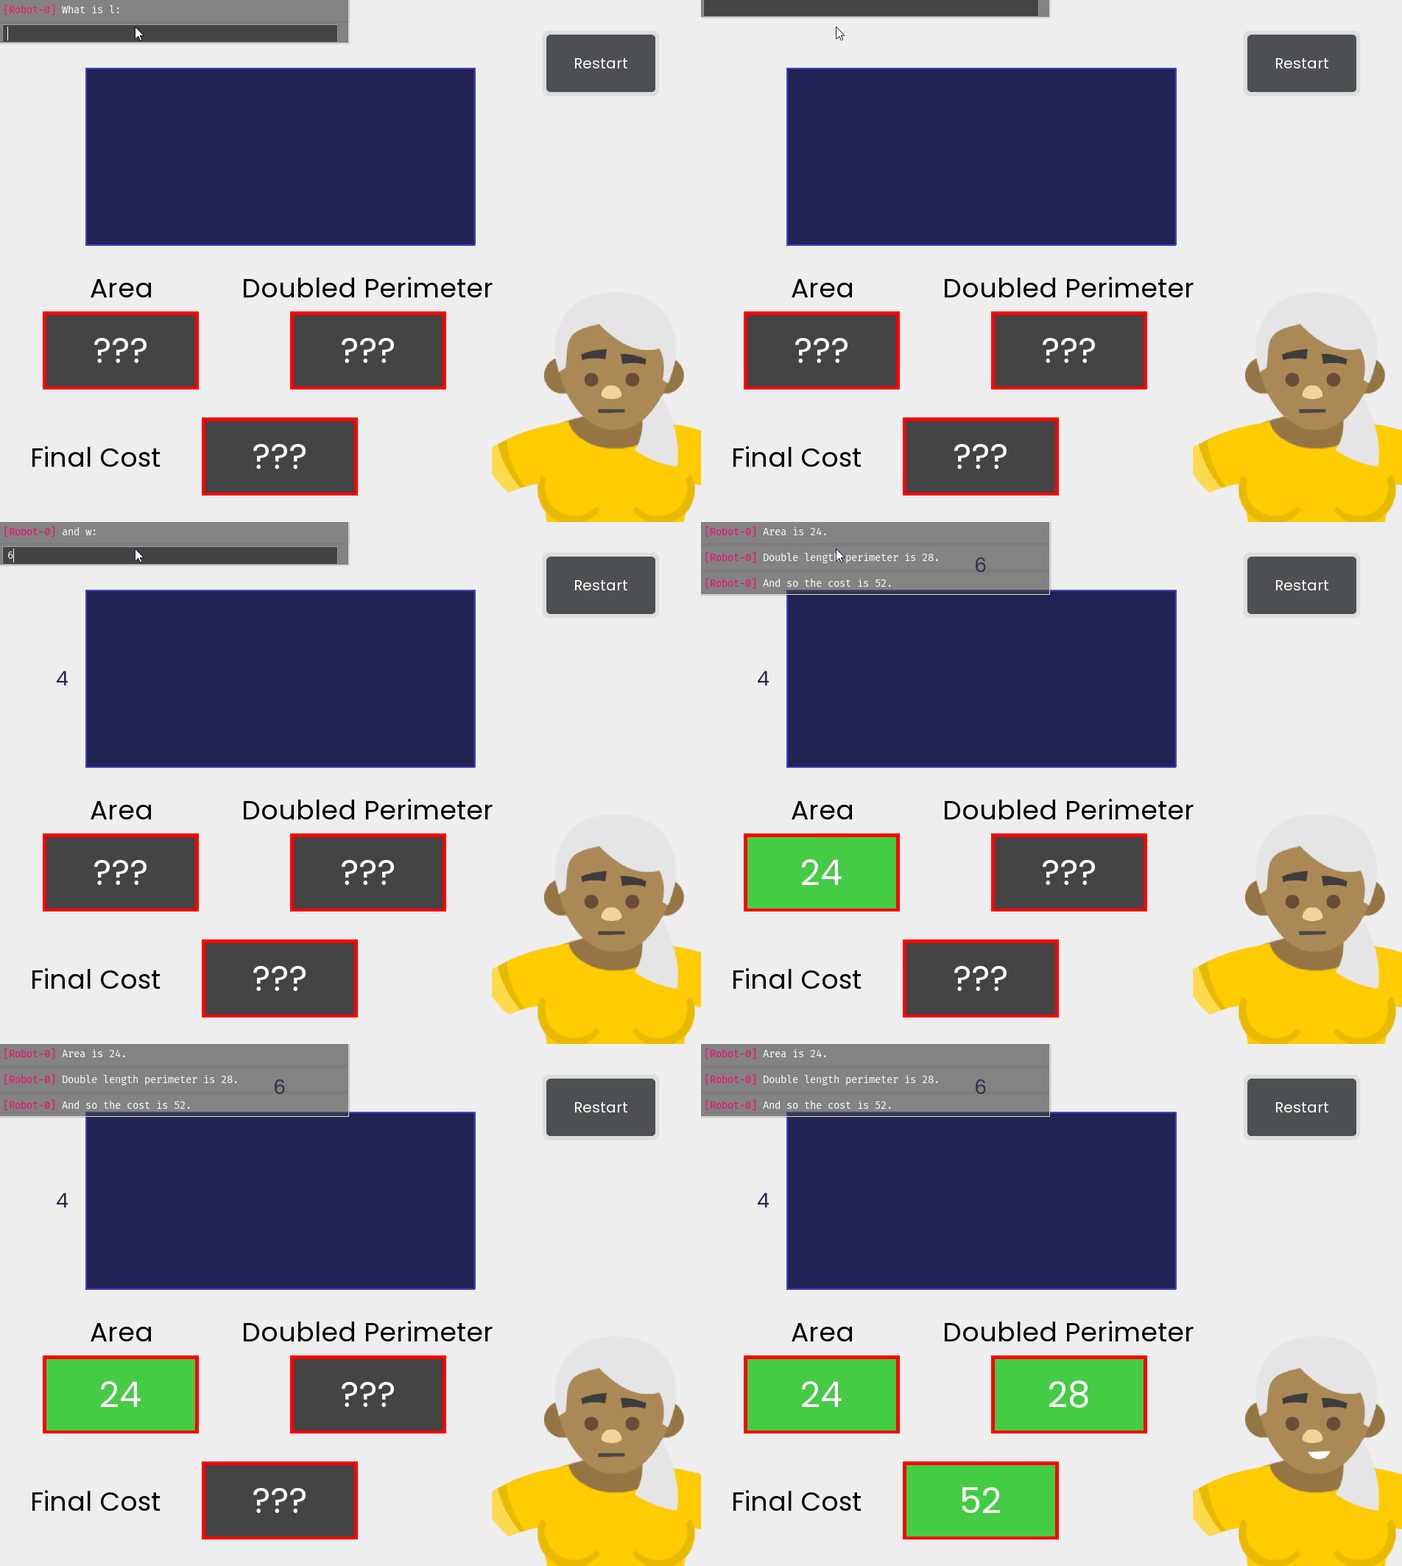
Serena is helping design metal sheets for a construction company. For a metal sheet of length l and width w, Serena wants to know the following:
- What the area of the sheet is
- If she doubled the length of the sheet, what the perimeter would be
Serena knows the cost of a metal sheet is the sum of these two values, so she prints this at the end of her code. Her code currently has some 3 bugs (errors) that need fixing. Can you find and fix them?
You can download the task here.

Try to fix the area first. Why is l * w not the area? If needed, print l and w.
Checkpoint Task
Now that we can control motors, print information and store information in variables, let’s combine this into one big project!
Download the task here.
You’re are a sentry robot, positioned on a grid.
Your objective is to move to a purple flag, which also spawns on the grid.
Positions on this grid are coordinates, just like on a graph, where a positive y coordinate moves up the grid, while a positive x coordinate moves right across the grid.
You always spawn at x=-50, y=35, but the spawn position of the flag is random (But always to the right and below you). Luckily you know what these coordinates are, so you can use this information to ambush the flag. The small grey dot in the centre is at x=0, y=0.
The first call to input in your program will receive the x coordinate of the flag, and the second call to input in your program will receive the y coordinate of the flag.
Modify the code, and add motors to your robot so that it can ambush the flag!
Here’s an example solution, with the motors hidden:

Provided you completed the “Square Dance” puzzle, you can reuse the first two steps (move right, move down). All that needs to be modified is how long we turn the motors on for… Try moving to the grey dot first, this can help you do some calculations.
If you can get to the grey dot, we know how long it takes to move 50 units, and how long it takes to move 35 units. Using either of these times, you can figure out how long it takes to move 1 unit. Now if we want to move R units for some number R, we just need to multiply the time to travel 1 unit by R to get the time to travel R units.
If the flag is at x=flag_x, and y=flag_y, then the distance between us and the flag should be 50 + flag_x horizontally and 35 - flag_y vertically. This should be all the information we need to travel to the flag.